A few months ago I took a few Ruby and Rails courses on Codecademy, just for the sake of learning something new, and I was quite impressed with the language and its beauty. While it has some scalability drawbacks, I found a perfect compact use for a RoR application as a tiny multi-purpose ACL application auth server. A few months later I started setting things up and boy, is it currently a mess documentation wise. So I decided to write down background, documentation and tidbits for both myself and my fellow readers who want to give it a spin for fun.
Getting frustrated with Rails
While the official guide does a good job introducing the base mechanics, if your projects deviates immediately after the creation of the project, you’re in a world of hurt. Since Rails 6, webpack became default, and without a proper configuration not even the default application won’t work.
Then there’s the issue with the many ways to Authenticate with Rails. Given the chance, instead of rolling my own I decided to go with Devise, mostly due to the availability of things like pwnd-password amongst its extensions.
Finally there’s a choice to be made: do we want to get Bootstrap from the chain or do we want to adapt with webpack? I chose webpack for no reason in particular. Mostly to tinker with it.
Installing the basics
Depending on what you read and where you look, different packages are recommended or suggested for compilation or installation. I don’t like to waste time, so I’ll give you the rundown:
- rbenv (usermode): allows usermode installation of ruby deployments and multiple separated versions, neat if you don’t want to install everything globally
- nodejs (I went with the most up to date, currently 13)
- yarn (to grab js packages)
- MariaDB-devel and MariaDB-shared (to use MySQL instead of SQLite)
I used rbenv-installer to bootstrap the initial ruby environment, it works great, and I would also suggest installing the rbenv-update plugin which can come in handy.
To get started with rails, we need to install the ruby and rails we want, and it’s fairly easy:
$ rbenv install <version>  # 2.7.5 as of today
$ gem install bundle rails
$ rails new <projectName> [-d mysql]
$ cd <projectName>
Adding Devise and some extensions
Inside the project directory, on top of all the files you will find, in order to setup additional gems to be used and updated in Rails, we will need to edit the Gemfile to add a few things. I chose the following:
gem 'devise'
gem 'devise-pwned_password'         # Pwnd Password db check
gem 'devise-security'               # Security features
gem 'devise_invitable', '~> 2.0.0'  # Invite by e-Mail
gem 'devise_uid'                    # UID instead of ints
Links: devise, pwnd, sec, invitable, uid, list of devise extensions (some of the extensions might be obsolete or require older versions).
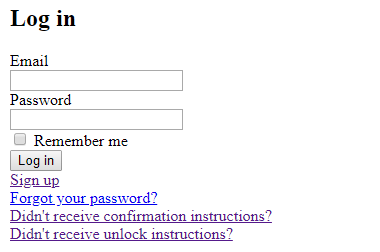
Installing devise can be done with the command rails generate devise:install. With the server started, pointing at <scheme>://server/users/sign_in should show you a login form. If it doesn’t, chances are Rails might be stopping you due to a security feature, in which case you need to editconfig/environments/development.rb and add the line config.hosts << "<your_server_hostname>" to it.
Configuring Devise along with its extensions will take quite some time, and for the sake of brevity I’m not going into it now, but could be a topic for another day. In any case I left links above to the documentation of everything that’s talked in this post, and you also have a lot of config files to read and edit, starting from config/initializers/devise.rb.
Webpack(er) and Bootstrap
If you’re starting straight with Rails 6 then you’re already set up properly with webpacker, otherwise you’ll need to run rails webpacker:install. But we still lack Bootstrap at this point, so we instruct yarn:
$ yarn install bootstrap jquery popper.js [expose-loader]jQuery and Popper are necessary to Bootstrap, while I personally installed expose-loader to expose some JavaScript objects provided with Webpack to the DOM. This can be done to access them from the browser console or as a way to gradually move away from the standard rails chain to webpack deployment, without having to rewrite working portions of the web application. In my case I chose this option because I quite like to tinker from the console browser. Also, expose-loader doesn’t do things automatically, so you can programmatically expose in development only, there’s no harm in that.
Now that it is installed, we need a few more steps to integrate its core files into our project. Start by creating the app/javascript/stylesheets directory with an application.scss inside it. Yes, we’re going to place Sass/Scss files inside the javascript directory, because that’s how webpack rolls. In it we put but one tiny line:
@import "~bootstrap/scss/bootstrap.scss"; This imports the standard Bootstrap stylesheet, just note that every alteration of the standard Bootstrap theme must be placed above that import.
The only thing left to do is import the JavaScript components and the stylesheet(s) for webpack to… well… pack. That is done in app/javascript/packs/application.js:
// Import Bootstrap JS & CSS and expose $, jQuery and Popper
require("bootstrap")
import 'stylesheets/application'
require("expose-loader?$!jquery")
require("expose-loader?jQuery!jquery")
require("expose-loader?Popper!popper.js")
It’s now time to reload the page and enjoy the victory.
The building blocks are now all in place, and all that’s left is to code everything else.